UPDATE 2012-08-17: I’m surprised at how much traffic this post still gets. The post is over 2 years old at this point, and may not be directly useful anymore. The Android landscape has changed a lot, and I haven’t touched an Android phone newer than my old G1’s.
There are a lot of suggestions in the comments, though, that new readers might want to check out to accomplish what I did with these instructions in 2010.
My wife and I recently abandoned our T-Mobile G1’s to become iPhone people. As much as it pained me to (temporarily, at least) abandon a nice open platform I had followed for some time, I have to confess that the new iPhones hit a sweet spot in a way that the previous three generations of iPhone simply did not (for me, at least).
But that is a post for another time. This post is about what we did with our G1’s once that service icon turned into an “X”.
The G1 is a wifi-enabled device. Even without traditional mobile phone service, it can be used with VOIP services. There are a number of paid SIP (Session Initiation Protocol)-based VOIP services which you can pair with a SIP application on the phone to create a fully-functional wifi phone.
But, that costs money. What about something you can use for free? Well, that’s where Google Voice comes in.
To understand how this works, you just need to know two things:
- There are a number of SIP providers that give you free incoming (domestic) calls, while charging for outbound calls.
- Google Voice traditionally works by calling your phone number, and then connecting you to the outbound number you intend to call (in other words, it turns an outbound call into an incoming one)
See where I’m going with this?
With a Google Voice account, a SIP service account, and the right Android apps to interoperate with each, you can have an Android handset that gives you free incoming calls, and free outbound calls by way of Google Voice’s method of connecting you.
The phone, obviously, must be in range of (and connected to) a wifi network to be able to make and receive calls. Well, my house’s wifi network is always on. So by setting up my wife’s old G1 this way and plugging it into its AC adapter in the wall, we’ve turned that G1 into an always-on, free “home phone line”. One with voicemail transcription and SMS, even.
The following instructions explain how I set this up with a phone that I wiped and started from scratch with. You should have no problems creating the same setup on an existing Android phone without wiping everything - I just wiped everything so that my G1 would be clean and not running any other junk that might slow the (easily slowed) phone down.
These instructions are geared primarily toward my use case of adding VOIP to an Android phone that no longer has active cell service. You can also add free VOIP calling to a phone that has service. If you have no data service, you can use VOIP entirely on wifi like I am. If you have 3G or EDGE data service, you have the option to have your VOIP service still be active when outside of wifi reach. You may have to make a couple of slight adjustments to these instructions for a phone that still has cell service, but they should mostly be obvious.
Phase 1: Getting Online with Freshly Wiped. Has-No-Service Phone
(skip if you’re just adding wifi calling to your active Android phone)
- Skip Google Account setup for now. With no service, it can’t connect to the Internet anyway, until we have wifi running.
- Set time settings (remember to set time zone - it’s not detected if you have no phone service)
- Settings -> Wireless Networks
- Wi-Fi (check to enable)
- Wi-Fi Settings -> pick your wireless network (and if you’re like me, type in painfully long, random character encryption key!)
- Type the key in again because you did it wrong the first time
- Mobile Network Settings
- Data enabled (uncheck to disable)
- Data roaming (uncheck to disable)
- Settings -> Accounts & Senc
- Now that we are on wifi, we can add our Google account
- Click “Add account”, enter Google account info as prompted
Phase 2: Download Required Apps from Market
- Log in to Google Talk (especially if you’re on wifi only - downloading from Market often fails if you’re not logged into Google Talk)
- Download Google Voice
- Download Google Voice Call Free
- Download sipdroid
- Download KeepWiFi
Phase 3: sipgate and Sipdroid
- Go to http://www.sipgate.com/one and click Sign Up Now and create an account (you will need a mobile phone with SMS to receive the confirmation text)
- When you have the account all set up and logged in, go to My Settings and click the “SIP Credentials” link way on the far right of the page. Keep this handy in a browser tab.
- Configure Sipdroid to use your new sipgate number:
- Menu Button -> Settings -> SIP Account Settings
- Enter the following Sipdroid settings with the information from the sipgate.com SIP Credentials
- Authorization Username = SIP-ID
- Password = SIP-Password
- Server or Proxy = sipgate.com
- Domain = (leave blank)
- Configure Sipdroid to use the connections you want
- Settings -> Call Options
- For a phone with no cell service, just have Use WLAN checked
- If you have cell service with data, it’s up to you whether you want to Use 3G and Use EDGE as well.
Phase 4: Google Voice
- Go to http://voice.google.com and create a Google Voice account (you will need an invite to Google Voice if you don’t yet have an account)
- You will be required to input a phone number to have GV forward to. You can input your sipgate number.
- Have Google Voice call you to confirm, enter confirmation number
- Launch Google Voice app
- Select Do not use Google Voice to make any calls. We will be using the Google Voice Call Free app to do the dialing.
- If you’re on a phone that still has normal call service, you’ll probably want to set this to Always Ask instead.
- If you have phone service, you can set GV to take over as the phone’s voicemail provider. If you have no service, ignore this option. Voicemail will come via the GV app.
- After setup, go to Settings -> Sync and Notifications, and enable Synchronize Inbox (and disable Notifications via text message).
- Select Do not use Google Voice to make any calls. We will be using the Google Voice Call Free app to do the dialing.
- Launch Google Voice Call Free app
- Select Use GV to make all calls under Enable Callback
- Enter your Google Voice account info
- Enter your sipgate.com phone number for the Callback Number
Phase 5: Keep WiFi Running
Android phones (at least, the ones I’ve used) put the wifi connection to sleep when the phone screen goes off. We want to stop this from happening if we want the phone to sit on wifi ready to receive VOIP calls all day.
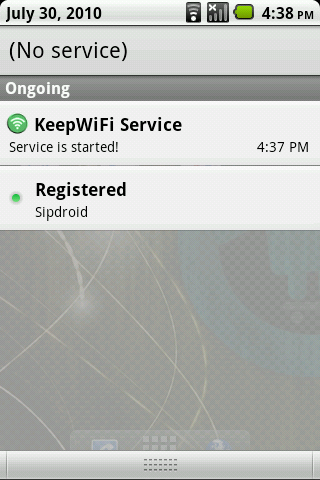
- Launch KeepWifi
- Enable it!
Phase 6: Enjoy Your New WiFi Phone!
Dial phone calls as normal. Google Voice Call Free will “intercept” the outgoing dial, and call your phone. Answer, and then GV will connect you to the number you dialed.
Missed calls will appear in the normal Android dialer.
Voicemails will appear in Google Voice. As long as you have Synchronize Inbox set, it will receive a push notification when a voicemail is received, and will give you the transcription and an audio file to listen to.